Installation Guide
CBM-1000 Installation
 Print Friendly Print Friendly

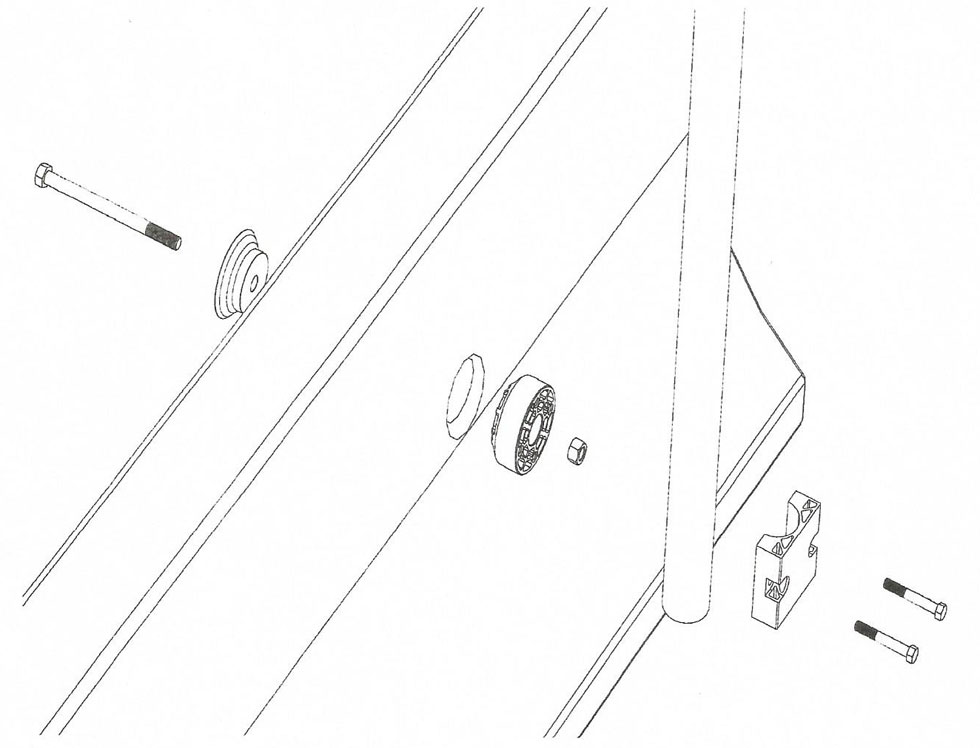
- Place supplied 5/8 inch centre bolt through base mount and barrier.
- Align mounting hole to ensure a straight sign structure. TORQUE 5/8 inch centre bolt and nut to 120 ft lbs.
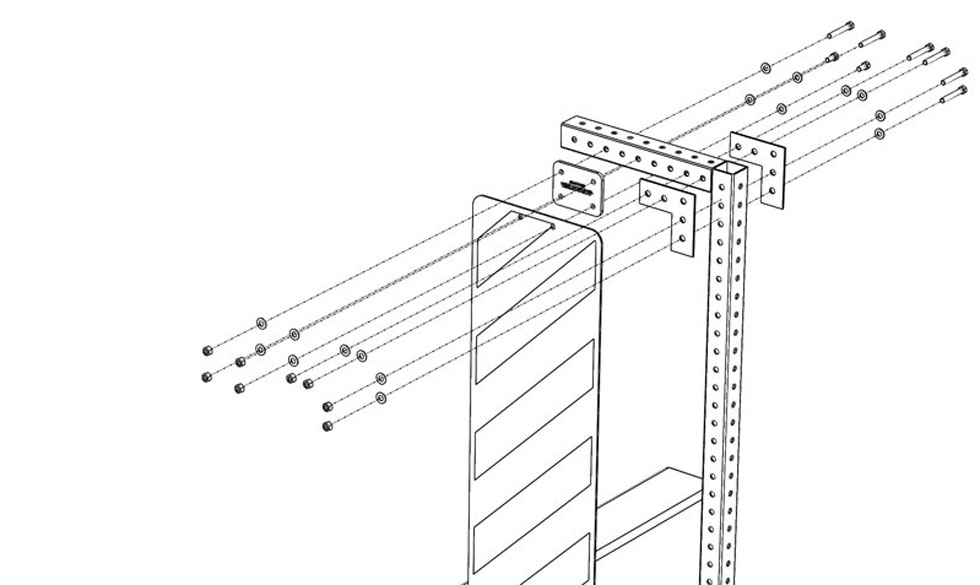
- Attach supplied "L" brackets tightly to Telespar with supplied 3/8 inch nuts and bolts.
- Attach Telespar post TIGHTLY to base mount using supplied stainless steel bolts and washers.
- Place supplied drill template on sign and drill 3/8 inch holes.
- Place YELLOW SWING on the back side of sign and attach with supplied nuts and bolts as shown. Use supplied WASHERS on the YELLOW SWING and sign face. Be sure to follow bolt, nut and washer placement on structure as shown.
- Place sign and YELLOW SWING to the face side of the Telespar as shown.
CBM-2000 Installation
 Print Friendly Print Friendly

- Place supplied 5/8 inch centre bolt through base mount and barrier.
- Align mount to ensure a straight structure.
- TORQUE 5/8 inch centre bolt and nut to 120 ft lbs.
- Use 7/16 inch stainless steel bolts for mounting Telespar post.
CBM-3000 Round Post Installation
 Print Friendly Print Friendly

- Place supplied 5/8 inch centre bolt through base mount and barrier.
- Align mount to ensure a straight structure.
- TORQUE 5/8 inch centre bolt and nut to 120 ft lbs.
- Connect round post bracket with stainless steel bolts loosely, then slide post in place and tighten bolts evenly.
WPM-1100 Installation
 Print Friendly Print Friendly

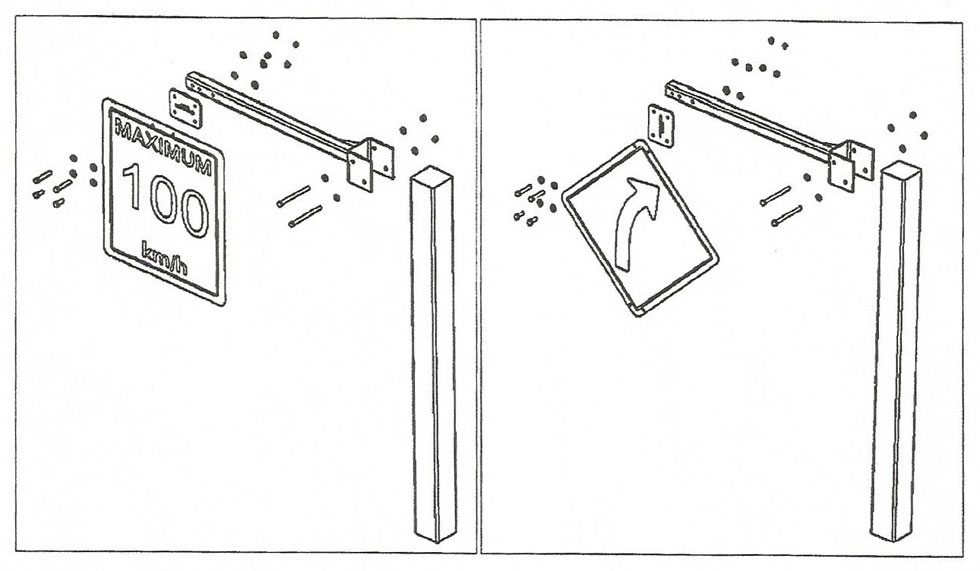
- Place metal bracket on wooden post.
- Mark holes, then drill 7/16 inch holes.
- Insert supplied bolts with washers and tighten nuts well.
- Place supplied drill template on sign and drill 3/8 inch holes.
- Place YELLOW SWING on the BACK SIDE OF SIGN and attach with supplied bolts, nuts and washers. Be sure to follow bolt, nut and washer placement on structure as shown.
- Place sign and YELLOW SWING to the FACE SIDE OF THE METAL BRACKET. Use supplied bolts, nuts and washers. Check placement.
NOTE: Tighten nuts on YELLOW SWING just until the washers push into the swing.
WPM-1300 Installation
 Print Friendly Print Friendly

- Place supplied Drill Template on sign and drill 3/8 inch holes.
- Place YELLOW SWING on the back side of sign and attach with supplied nuts and bolts as shown. Use supplied washers on the YELLOW SWING and sign face. Be sure to follow bolt, nut and washer placement on structure as shown.
- Place sign and YELLOW SWING to Telespar being sure to place on the face side of the Telespar as shown.
WPM-1400 Installation
 Print Friendly Print Friendly

- Attached supplied "L" brackets tightly to Telespar with supplied 3/8 inch nuts and bolts.
- Place supplied drill template on sign and drill 3/8 inch holes.
- Place YELLOW SWING on the back side of sign and attach with supplied nuts and bolts as shown. Use supplied washers on the YELLOW SWING and sign face. Be sure to follow bolt, nut and washer placement on structure as shown.
- Place sign and YELLOW SWING to Telespar being sure to place on the face side of the Telespar as shown.
|
